How Can We Help?
How to Leave Comments in Figma Prototypes
If you’ve ever worked with Dauntless before, you’ll likely be accustomed to some of the tools we use for collaboration and feedback. This series is designed to give you quick references to our ways of working, guidance on how to use any of our collaborative tools, and to give you a place to request features or add your suggestions.
What is Figma?
Figma is a design and prototyping tool with similarities to Adobe XD. Figma is a digital product design tool, specifically for designing websites and apps. (Of course, it can be used for other outputs, but this is its intended function and how we primarily use it.)
It allows us to more efficiently create User Experiences (UX) and User Interfaces (UI) as well as test and refine the Customer Experience (CX). We can go from wireframe directly to prototyping, animating and testing, all from one system. And even better, Figma allows us to design in multiple screen sizes.
Why We Use Figma
A few months ago, we moved away from using Adobe XD and switched to Figma as our primary UI/UX design tool. It’s so much more than just a design and prototyping tool.
Benefits
- We can collaborate with other Crew mates and design together in real time – but much better than in Adobe XD.
- Companies have projects that make it easy to organise and share with our Crew.
- We can test on multiple devices with the Figma app installed, but what’s more, is we can create and view our prototypes in multiple screens within one Figma design file.
- We can create links to share with anyone, and they automatically update as we make changes. This is a huge improvement over Adobe XD, where only the owner of the file could update the prototype, and there was only one owner per file. (This got extremely awkward and unwieldy as we had people on holiday or on maternity leave.)
- Clients can leave comments and feedback easily, and depending on the permissions set, they may not need to set up an account. Our preference, however is that people do sign in and leave comments so we know who they’re from and have some context. It also helps us know who to inform or respond to to when changes are made.
- Developer handoffs are easier, as the component creation and management in Figma is far superior to that of Adobe XD. Developers who have accounts with Figma can automatically see and inspect the code from within the design file. Designers don’t need to export much of anything, as it’s just made available from the beginning. Just this aspect of Figma saves our team quite a bit of time – not to mention frustration!
Drawbacks
As with any software or tool, Figma is not perfect. But it’s definitely become one of our favourite tools for designing, presenting and developing our digital products.
Here are a few of the drawbacks we know about:
- Being a more mature product, it does A LOT, which can be a little overwhelming without correct processes in place. This also means it has a bigger learning curve, which can be a drawback for a team considering shifting from another design tool.
- Figma’s user permissions are vast but their billing process is overly complicated. Editors cost money, but viewers don’t. And they charge on a 3-month basis. It’s just not ideal for a team that needs flexibility.
Leaving comments in Figma: A step-by-step tutorial
How it begins
First, you’ll receive a link from us to view your design prototype or presentation. This is where you can leave feedback for our Crew to make the adjustments you need or to let them know what you like (or don’t).
The link will look a little like this:
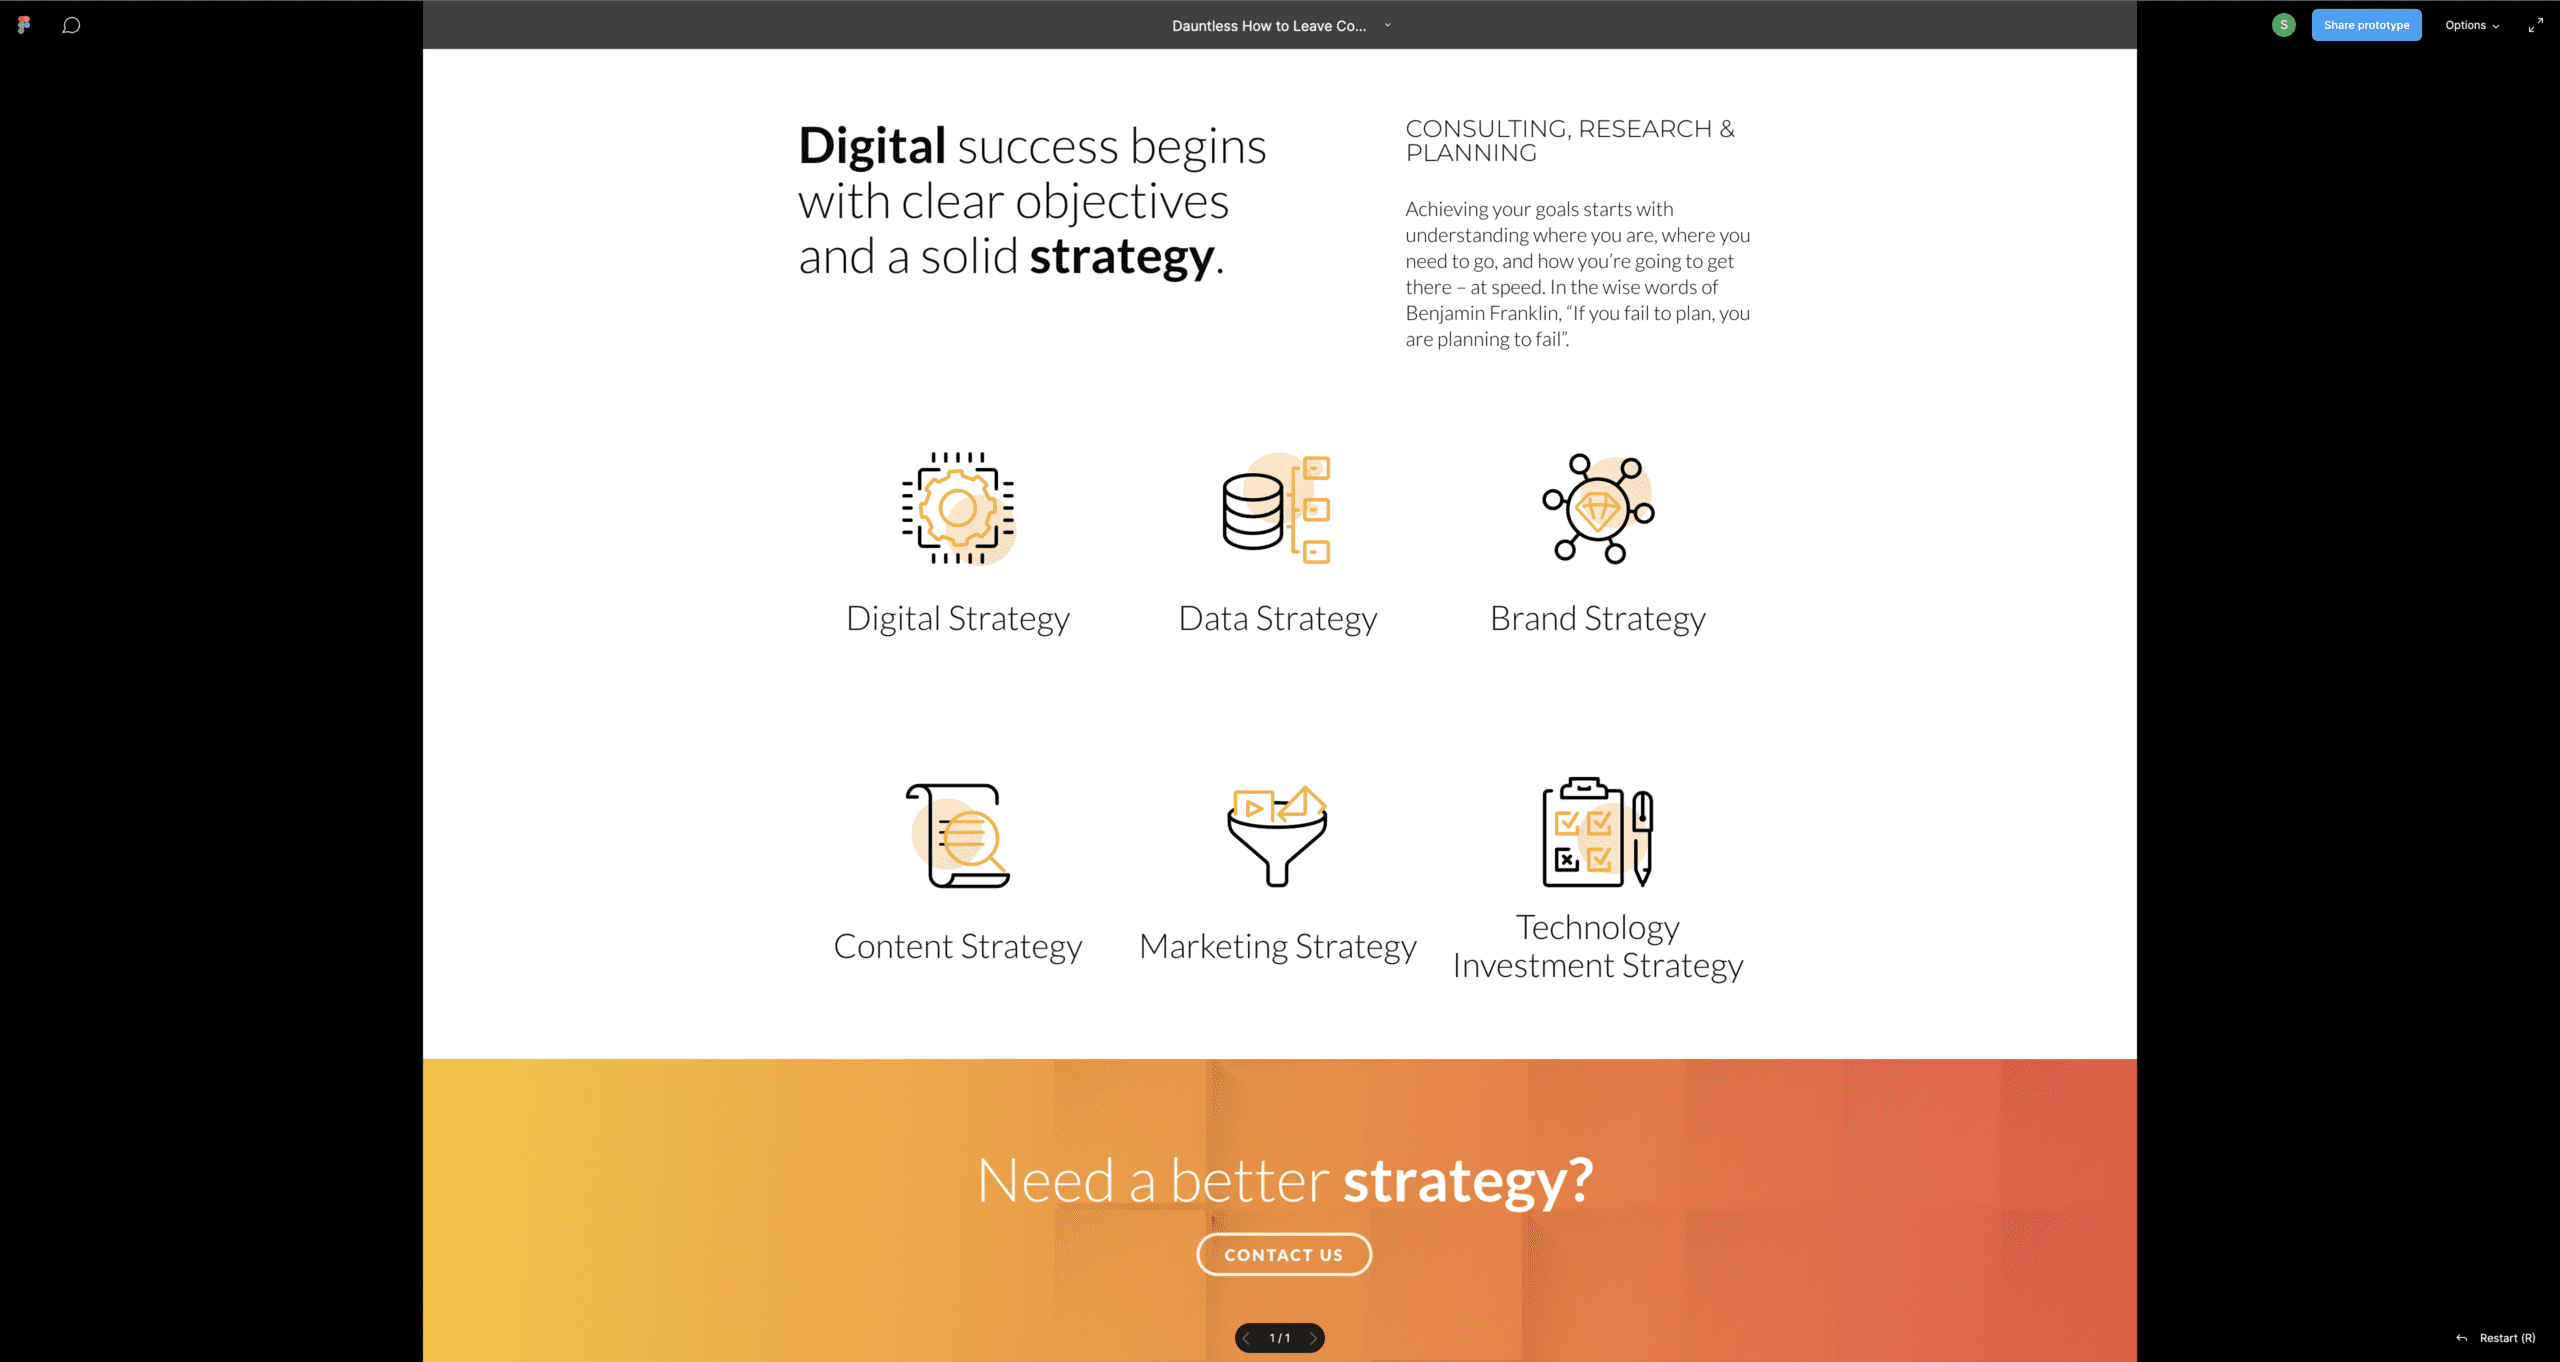
You should see a screen like this (but obviously with your designs):
If you don’t see any of the tools at the top, begin by moving your mouse to the top of the page, and that should “wake” them up so they show up for you.
Viewing Your Prototype or Presentation
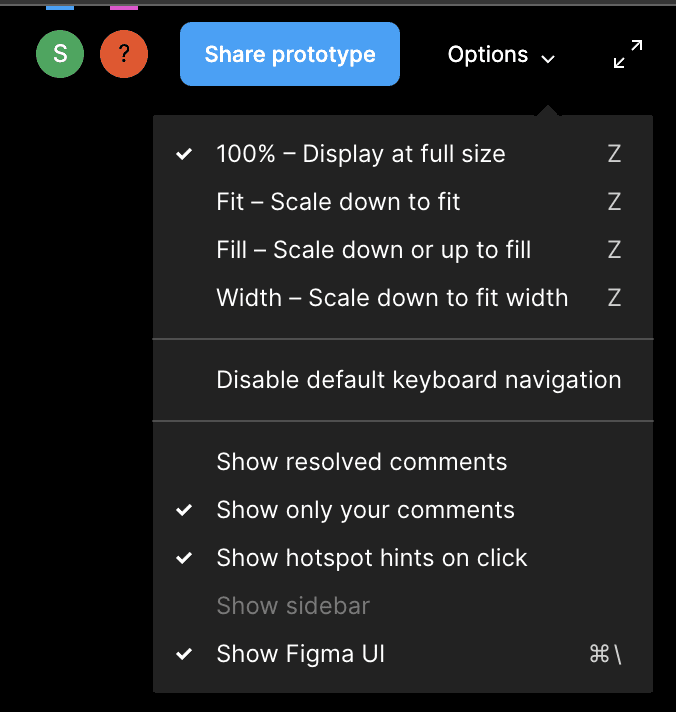
There are several options to view your prototype depending on your screen size and the size it was designed for. You can find these under the top right corner dropdown lovingly and aptly named “Options”.
100% – Display at full size – This will display as the prototype was designed and is recommended.
Fit – Scale down to fit – This will shrink the prototype to fit your screen. So, if you’re on a smaller or larger screen than it was designed at, you might have a very different experience.
Fill – Scale down or up to fill – This also may distort the experience by artificially shrinking or zooming into the designs.
Width – Scale down to fit width – This may be useful if you are struggling to see the entire screen width-wise. But again, may distort the experience as it was designed to be viewed.
Using and Viewing Flows
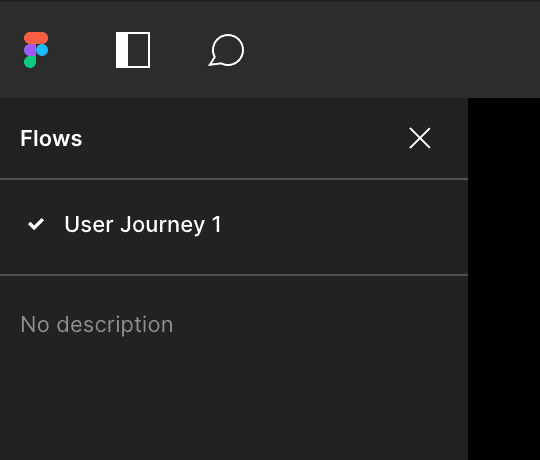
But, what is a “flow”?
It’s a pre-designed user journey that has been linked together to mimic a real world digital product. These journeys are usually split into user types or roles. For example, a customer will view your e-commerce website very differently to your employees, who may be managing from the back end.
If you have multiple user types, you’ll find their specific user journeys in the pop out panel in the upper left hand corner.
Ready to leave some feedback?
In the upper left corner, you should see the Figma logo (it’s a colourful “F”) and directly next to it, is a speech bubble. Click on that to enable comments. It should turn a blue colour, and give you an orange marker that you can drag around the screen.

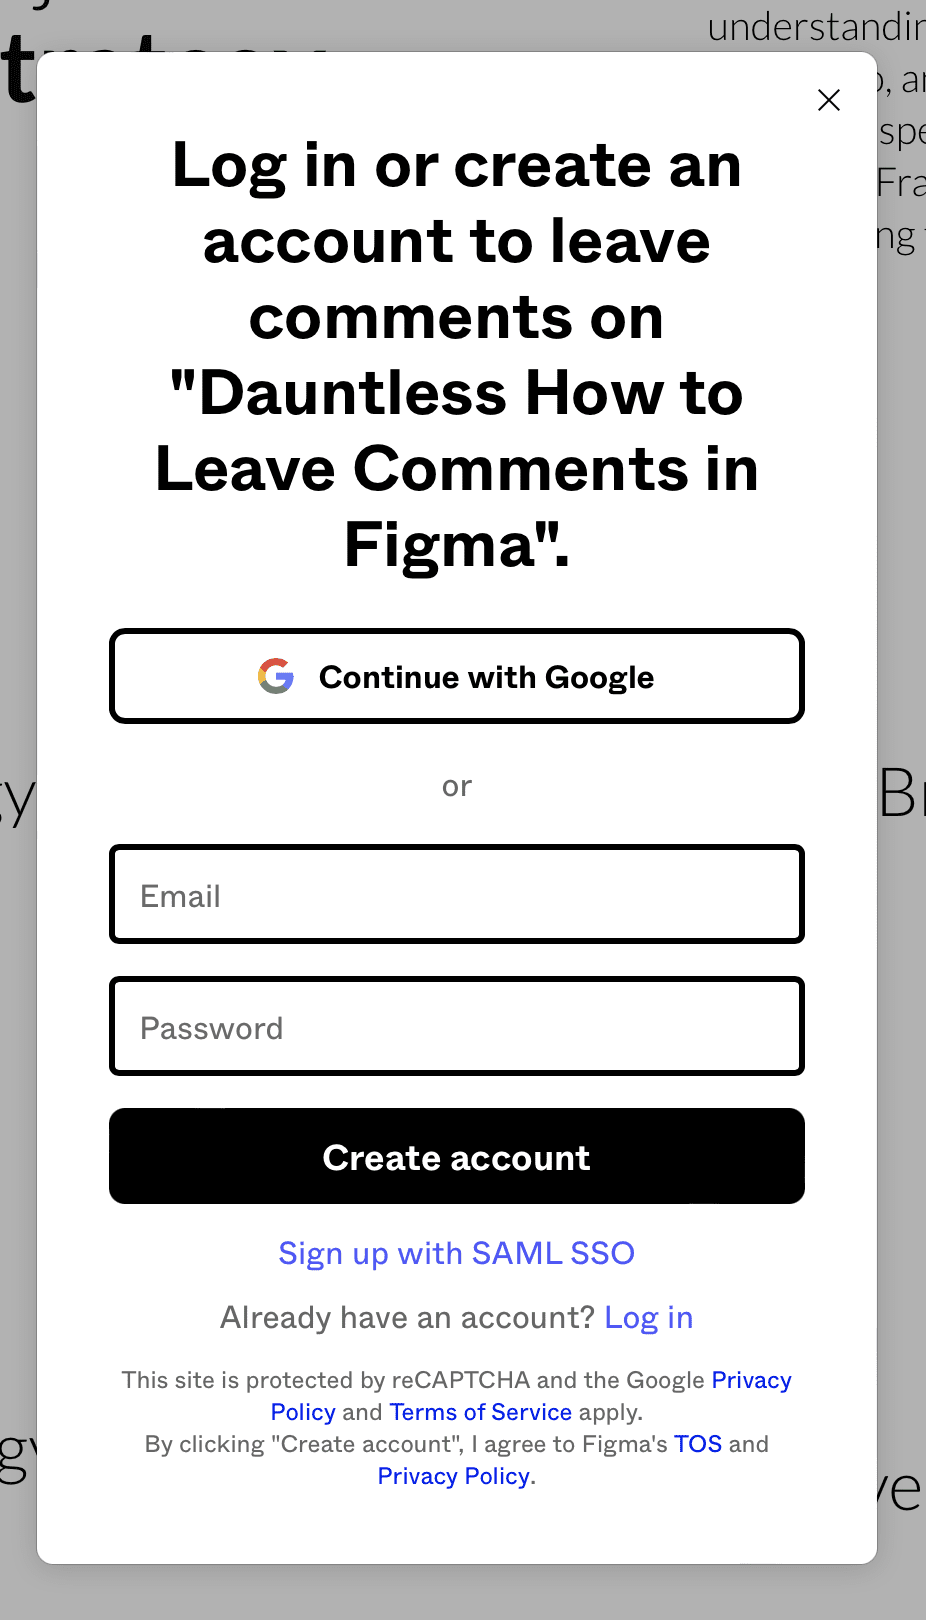
Before you can add a comment, Figma will prompt you to log in. If you have an account, you can sign in, but otherwise you’ll need to create one (so we know who the feedback is from).
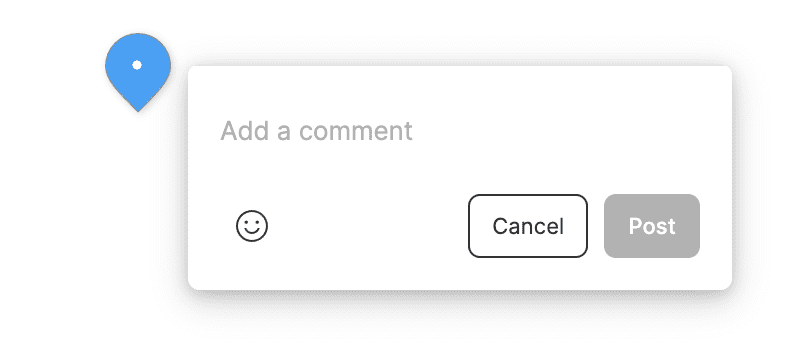
To leave a comment on a specific place on the screen, just place the pin near where your feedback should go. This will give you a dialog box where you can say just about anything (there’s even emojis should you need help).
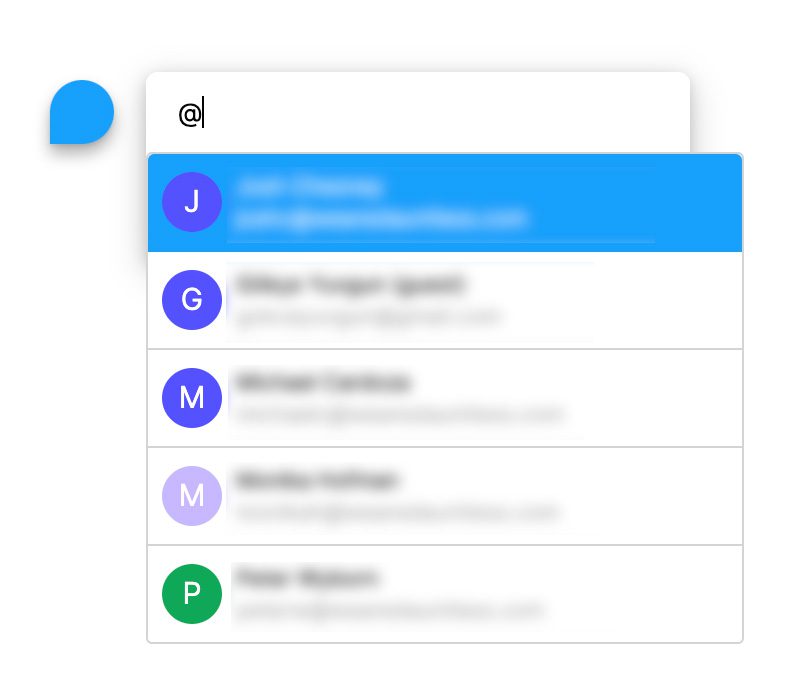
If you want to direct the comment to a specific person that is on the project, all you need to do is add an @ mention. Type the symbol “@” and you’ll get a drop down list of people you can select. Alternatively, you can search by name within the dialogue box.
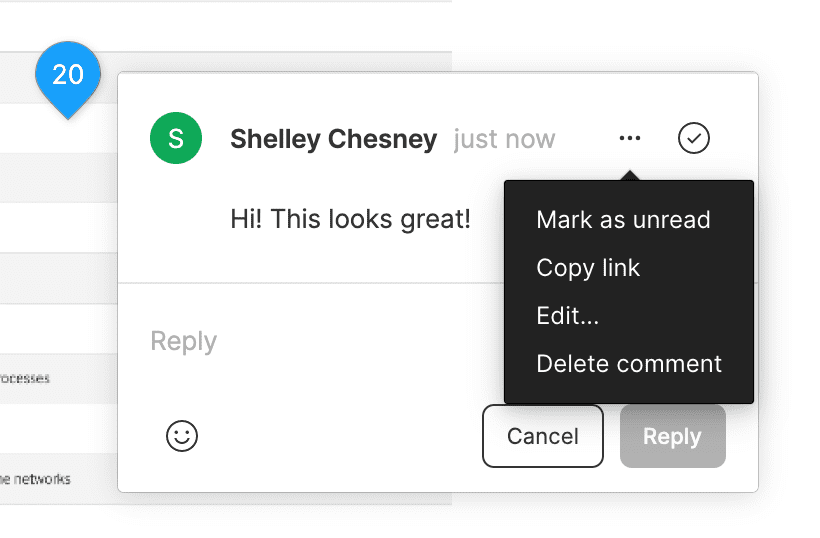
After you’ve made your comment(s), there are options within the comment dialogue box. You can reply or add more to the comment, plus you can:
- Mark as unread
- Copy link
- Edit
- Delete comment
- Resolve the Comment (just click the circular check icon, and it will turn green)
Viewing, Searching and Filtering Comments
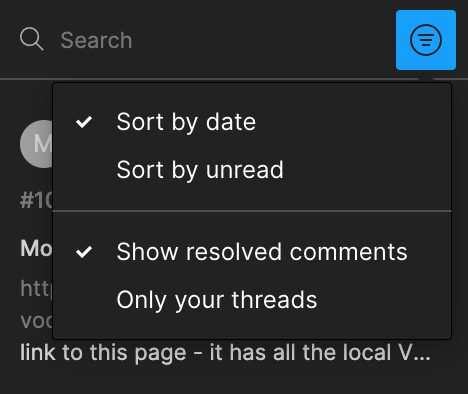
It’s easy to find and filter comments using the menu on the Comment panel. You can
- Sort by Date
- Sort by Unread
- Show Resolved Comments (these hide by default)
- Show Only Your Threads
Functionality Cheat-sheets
We’ve created a handy cheatsheet for the Figma prototype viewer and all the operations you can perform.
Top Navigation: (Image opens in a lightbox)
Bottom Navigation: (Image opens in a lightbox)
Things you can do on Figma’s prototype viewer
- Leave contextual comments by placing a comment on specific areas you want to leave feedback on
- Reply to comments
- Link to a specific comment
- Edit or delete your comments
- Change the prototype display view
- Depending on how the prototype was set up, you can navigate through screens with the arrow keys
- Filter comments by resolved or just yours
- Turn Figma’s UI off and on (helpful when you need to focus on the design)
- Toggle Hot Spot hints on or off
- Restart the prototype flow
Other things to understand
Desktop prototypes tend to look better when your browser is full-screen.

